2,768 REVIEWS
Create Your Own Hanging Basket
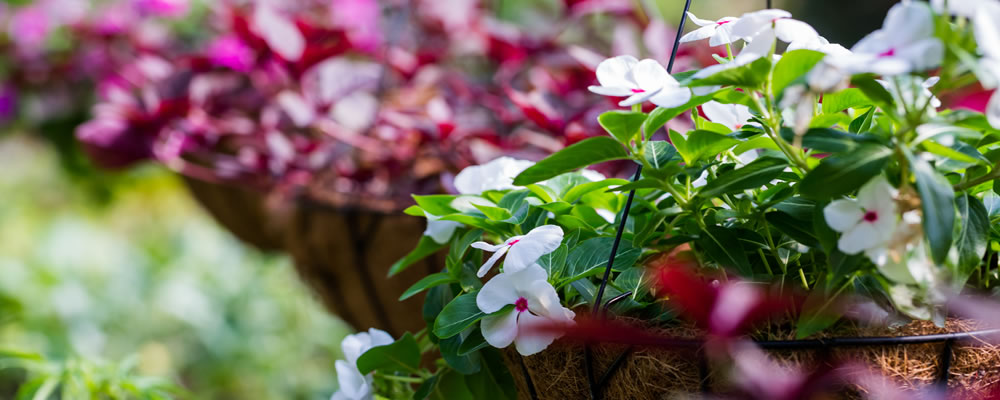
We think that hanging baskets provide a great opportunity to get some of our favourite plants where we like them, front, centre and of eye level.
We also think that by taking a little time and putting in a little more effort you can create your own unique example, that will not only provide you with a fantastic floral display but also the personal satisfaction that it was all your own work.
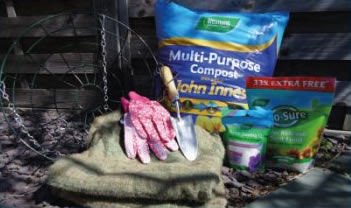
| What you will need: Basket Plants Lining Compost |
Required Tools: Gloves Trowel Optional Extras: Slow release plant food Water saving gel |
Step 1
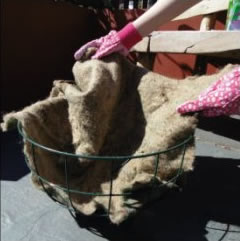
Line your basket Having selected the style and size of basket that best fits in with your decor, chosen plants and available space, the first and one of the most important jobs is to odd a quality lining. Lining your basket will not only help to keep your compost in place and neaten the baskets appearance but also help control water retention and drainage. Remember, removing the chains at this stage will give you extra room when you're looking to add the compost and plant up your flowers. For this example, we hove chosen to use a wire basket with a fibre lining to create on organic look, but have a wide range of styles available to suit your decor.
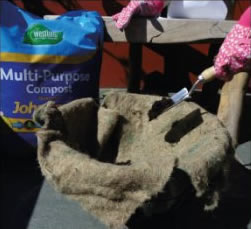
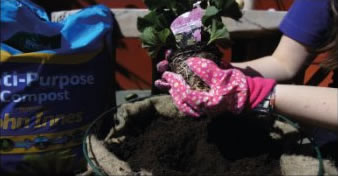
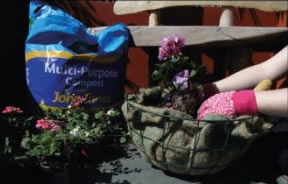
Step 2 - Choose a good soil
While you can use standard garden soil, we would recommend the use of a multi-purpose or specialist compost to get things started. Further consideration should be given to the addition of water saving gel granules as well as a slow release plant food. The water saving gel will absorb and release water as plants need it, by maintaining moisture in the soil, while a slow release plant food will feed plants for up to 6 months, providing extra nutrients and help when most needed. Don't forget, when filling your basket with your compost mixture; ensure you leave 1-2 inches free at the top to allow room for planting.
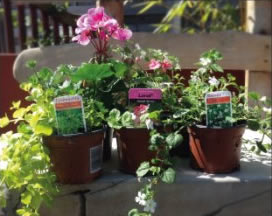
Step 3 - Selecting your plants
Selecting plants is one of our favourite parts when creating a hanging basket, and a chance for everyone to add their own personal touch. Try and choose a selection of plants that will complement not only each other but will work well with your current garden. There ore lots of plants that can be grown in baskets, including cheerful annuals and trailing plants. Remember, trailing plants work well on the edge of hanging baskets, while taller plants can be used to create a striking centrepiece.
Step 4 - Prepare your plants
Preparing your plants for planting, is a small and often overlooked task, but will pay dividends in the long run. When removing any plants from their pots gently squeeze the pot and tap the roots to loosen, this will free up up the root ball, ensuring the roots will spread out in the soil, while preventing damage to its delicate structure.
Step 5- Planting up your basket
Dig a hole around 3 inches aeep for each plant and place the loosened roots into the soil. Once you are happy with the position of the plant, gently cover the roots with extra compost and try not to over compress the soil or roots. When planting up in your hanging basket try to ensure that you do not overcrowd it with too many plants, leaving room for growth, especially for those fantastic trailing plants.
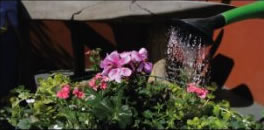
Step 6 - Water your basket
Once you are happy with your final basket, use a watering can with a rose to give the plants a light misting of water, this will not only wash off any excess soil, but also give your basket a healthy start to life
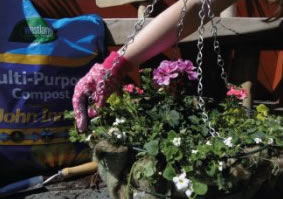
Step 7 - Hang your basket
If you have not already done so, choose a position that will not only have o good source of light for your basket, but also maximise the view of all your hard work.
Once your basket is ready to hang, reattach the chains and place on a suitable sturdy bracket. Take care when lifting as it will not only be a lot heavier then when you started, but you do not wont to damage those delicate plants. Finally sit back, enjoy and water when required.
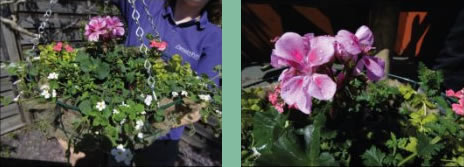
The plants we used:
Geranium Centre piece
Bacopa White trailing
Lanai Sweet Stripe Pink trolling
Lysimachia Extra foliage