2,768 REVIEWS
Create your own Pre-formed Pond

Ponds are a great addition to any garden, bringing a touch of tranquillity and wildlife to your garden. Not only this, but garden ponds are an excellent way of adding a centrepiece and make any outdoor area look great!
Pre-formed ponds are a great alternative to pond liner as they already have a structured shape and are extremely durable as they are made from tough and rigid materials which are less prone to punctures, offering a perfect crease free finish. Our step by step guide will help you construct your very own garden pond.
Stage One
You will want to build your pond in an area where you and your family will enjoy it the most, such as next to decking or close to your patio. Position your pond so that it can be seen from a room where you spend a lot of time, maximizing your enjoyment. Ideally your pond should be built in a position which will receive 5-6 hours of sunlight to ensure pond plants will thrive. More than 6 hours of sunlight may lead to algae growth.
Stage Two
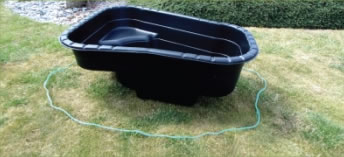
Lay the pre-formed pond on the area you wish to build your pond. Once you are happy with the postion of your pond, define the perimeter in preparation for digging. This can be done in several ways; you can do this by using a spade and marking the soil surrounding the pond, alternatively you could use a piece of string or stakes to surround the shape.
Stage Three
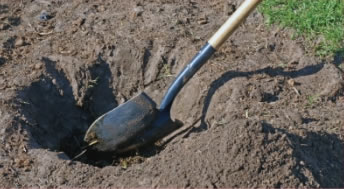
Remove the pre-formed pond and begin to dig out th,. shape you require. When fitting the pond, fry to make the excavated hole a close match to the contours of the moulding, allowing the protective sand layer to make up ony discrepancies later on. Whilst you are digging, clear the area of any sharp stones or roots. Try to dig downwards instead of sloping the sides, this will result in more even surface, ensuring that the hole is 5cm wider and deeper than the pond.
Stage Four
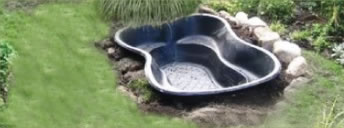
Evenly line the base of your dug Out area with 3 to 4 inches of damp sand. Once this is completed, use a spirit level to check that the surface is even and level on all sides. Next, gently lower the pond and fit into place.
Stage Five
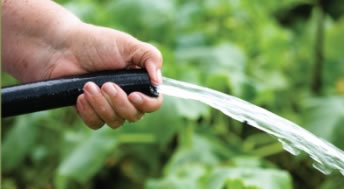
Start to slowly fill the pond with water. It is important that a Pond should be filled and dlowed to settle for at least seven days before any rocks or slabs ore placed around the edge. This allows for any ground settlement beneath the pond due to the weight of water. Whilst the pond is filling up, start to fill in the gaps between the pond and the edge of the excavation with sand and top soil. Once your pond is full you should add a suitable conditioner to reduce chlonne and other chemicals in the water.
Stage Six
Use rocks or slate to disguise the ponds man mode structure, giving it a natural looking finish and bringing attention to your garden. Alpines work well in a rockery to add a touch of colour and life. If you are adding a water feature, choose a style that is suited to the materials used. This will tie the two together and create a stunning rockery for your pond. A water feature is also a great way of keeping your pond oxygenated for your fish.
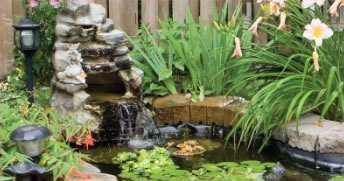
Stage Seven
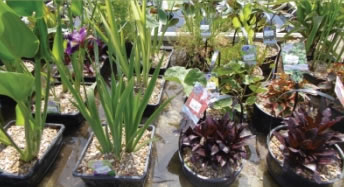
Your newly constructed pond will help to attract wildlife and create visual interest in your garden. Depending on the size, shape and depth of your pond, different plants will offer different things. Marginal plants offer an ornamental touch and can soften the harsh outlines of a pond. Using the preformed shelves, place your plants at their required depth. Oxygenating plants should be placed at the bottom of the pond and wil provide cover for aquatic life.
Stage Eight
Leave the water to settle for around two weeks before adding any fish. There is a great selection of pond fish to pick from but make sure you choose fish that are suited to the size and depth of your pre-formed pond Shubunkins or goldfish are good for smaller ponds whereas koi and carp require a much larger pond space. Bottom feeder breeds are a great way of preventing algae growth.